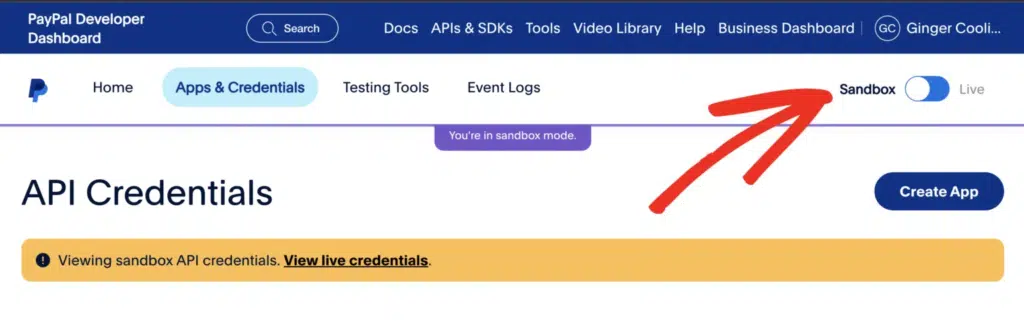
After you login, you will be presented with the PayPal Developer Dashboard screen. You will have the option of Sandbox or Live mode . Our screenshots will show that the Sandbox mode is active. We recommend this starting out as it provides the ability to do test payouts without using real currency. The slider in the top-right corner allows you toggle between Sandbox and Live mode.
If you do not have a set of Sandbox credentials, you can read more information on how to create those in PayPal’s sandbox testing guide. The steps below will be identical whether you are in Sandbox mode or Live mode.
Next, you’ll want to click on the Apps & Credentials button on the menu.
There are two payout methods possible with PayPal, however, we’re focusing on the API Application. This is the preferred method as it utilizes PayPal’s REST API, whereas PayPal MassPay is an older PayPal technology that is no longer available for new accounts. If your account already has MassPay enabled, then you’ll know where to access your credentials to apply in the AffiliateWP settings. Otherwise, you’ll want to proceed with the API Application setup method which is covered here.
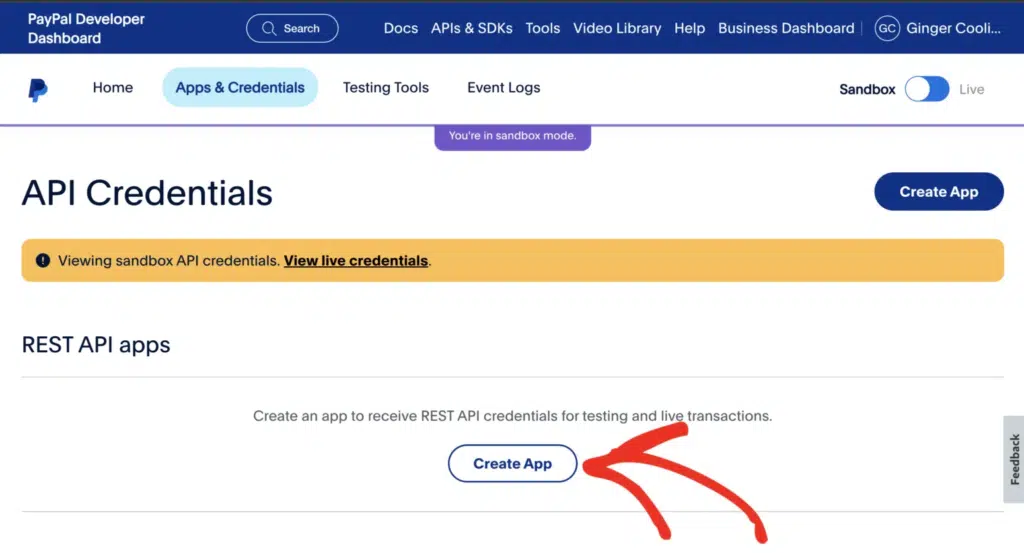
On the next screen, you’ll want to click the Create App button.
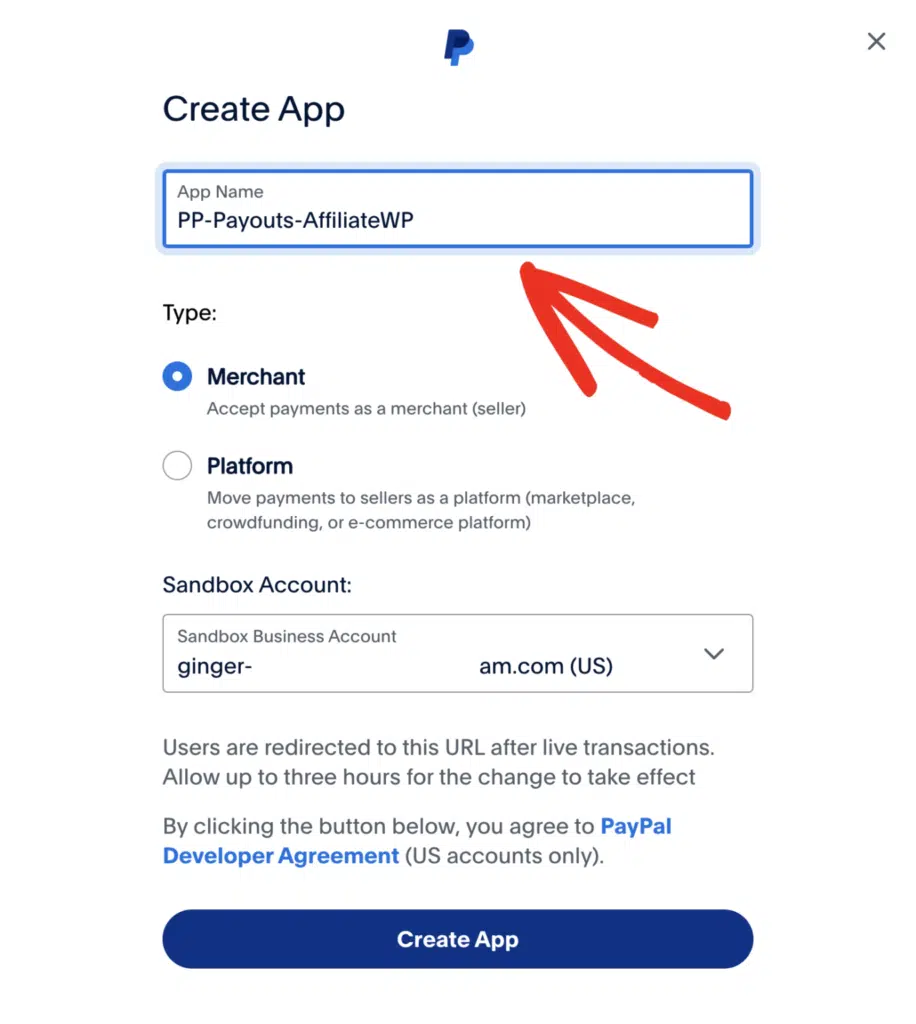
On the Create App screen, all you’ll need to populate is the App name field with your preferred name. Leave the default Type selection as Merchant, and change your Sandbox/Live Business Account email if needed. When finished, click on the Create App button.
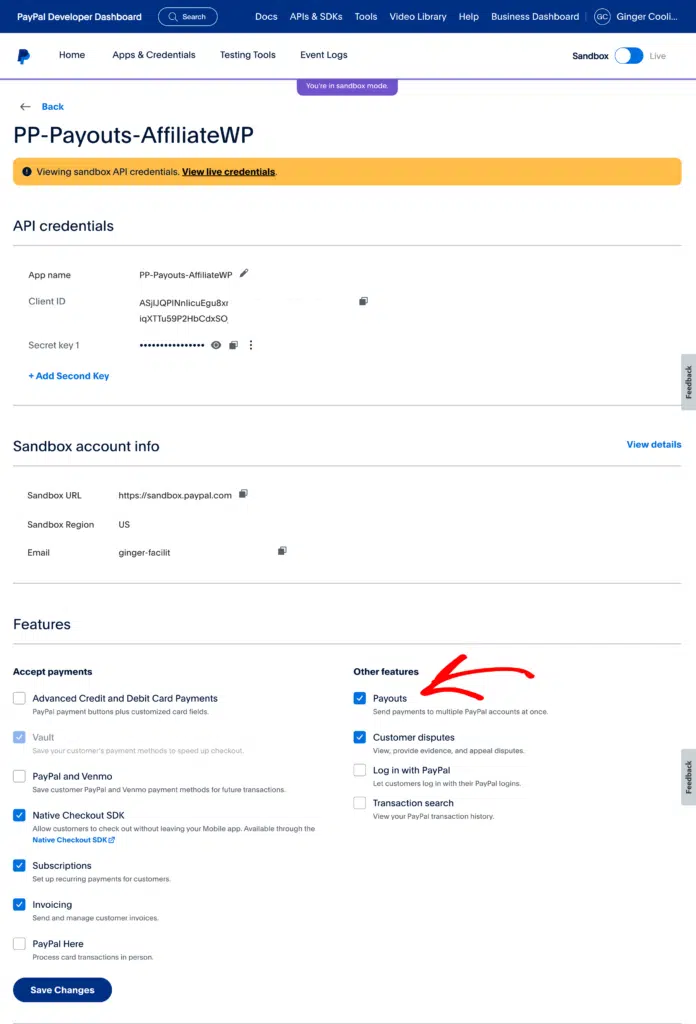
The next screen will show the completed App API with your new credentials. In the Features section, note the Payouts checkbox is already selected which is what is required. There are no other changes needed here, you can click to go back to your main dashboard page.
That is it, you have created your new PayPal API app!